Using Jekyll & AWS Amplify for your blog!
This blogpost will share how I deployed my Jekyll site to AWS, using AWS Amplify and Route53, be warned, it’s a bit on the lengthy side.
Hi, Let’s Set Up a Blog!
Jekyll is a static site generator that makes having a personal website, blog, portfolio, etc., very easy to set up. Being an Operations Engineer, my exposure to HTML & CSS really only took off back in the MySpace days, and it’s been a while since I’ve used either. If you’re looking for a low/no code solution, this may be a perfect fit for you.
What is AWS Amplify? On AWS’s site they describe Amplify as a service that can help to quickly configure backends, deploy frontend static websites, and more, while supporting many frameworks.
Requirements Check
Jekyll does have a fairly robust docs page and I was able to confirm my local machine met the requirements (currently I am on MacOS 11.1, Ruby 3.0, and RubyGems 3.2.3). I actually found it easier to follow the actual blog set up process by following the README’s on individual themes instead of following the default on the docs page ("jekyll new myblog"). Granted, not all themes are up to date and have active contributions, but the theme that I landed on did.
** IMPORTANT FOR RUBY 3 **
There’s a known bug as of this blog post where Jekyll fails to serve on Ruby 3. Check out this open issue. TL;DR: I ran this: "bundle add webrick".
I decided on the Minimal Mistakes theme and went to work using the quick start guide. First, I added this theme to my Gemfile, did a bundle install, and then added my theme to _config.yml - this was a breeze. Once that was done, I tried to confirm the base image was ok by running "bundle exec jekyll serve" in my terminal.
After I confirmed the out of the box config works, I pushed an initial commit to GitHub. I highly recommend using some sort of version control and committing after a big change that doesn’t break your functionality. You don’t want to to be put in a situation where you don’t know what your last known working config was without having a good version control system.
Updating _config.yml
In my _config.yml I enabled features that I wanted, such as; Google Analytics (pro tip: set your provider to: "google-gtag", didn’t work for me if other providers were listed), comments, adding a photo, my domain, etc. I ran my local Jekyll server again to confirm it looked good and it did, so I moved on to creating the appropriate root files for links/nav/pages.
Links, Assets, Navigation, & Content
- Added a “resume.markdown” file which points to a folder in my “assets/images/FILE_NAME” path to show an image of my resume.
- Created “tag-archive.md” to set up the tags feature for better filtering of future blog posts.
- Created “navigation.yml” & “ui-text.yml” in a directory I made titled “_data” to cover the navigation for my site.
- Updated the “about.markdown” file to just have a basic about me post.
Hosting on AWS
Ok! Once our blog works on our local machine & looks good, we can move on to deploying it somewhere so the rest of the world can see 😄 I decided to go with AWS Amplify for now, but may go with GitHub pages since Jekyll is hosted for free on there.
First thing I did was make sure my domain was still valid, if you do not own a domain, you can purchase one! Simply google “buy a domain” and you’ll get a ton of results, do your research and make sure you find the one that best fits your needs.
Once I confirmed my domain was good, I created a Terraform file for my Route53 entry. If you are not familiar with Terraform, you can easily do this in the AWS Console instead.
SIDE NOTE
you must have an AWS account to proceed with the tutorial after this point, some features are free and fall into the free tier, some are not. PLEASE be aware of the resources you are spinning up and using, it can be a very costly cloud provider.
To create an entry in Route53 with Terraform, all you need is this:
resource "aws_route53_zone" "primary" {
  name = "example.com"
}
very easy! It creates the nameservers and other resources after doing a "terraform apply".
Alternatively, if you do not want to use Terraform, in the AWS console, you can go to the Route53 page (search for this under all services) and then select the “Hosted Zones” on the left hand side. Then click “Create Hosted Zone” and enter the information requested and click the “Create Hosted Zone” button.

After a few minutes, DNS should have propagated out, take note of your “NS” (nameserver) entries, we will need these values later on for our custom domain.
AWS Amplify
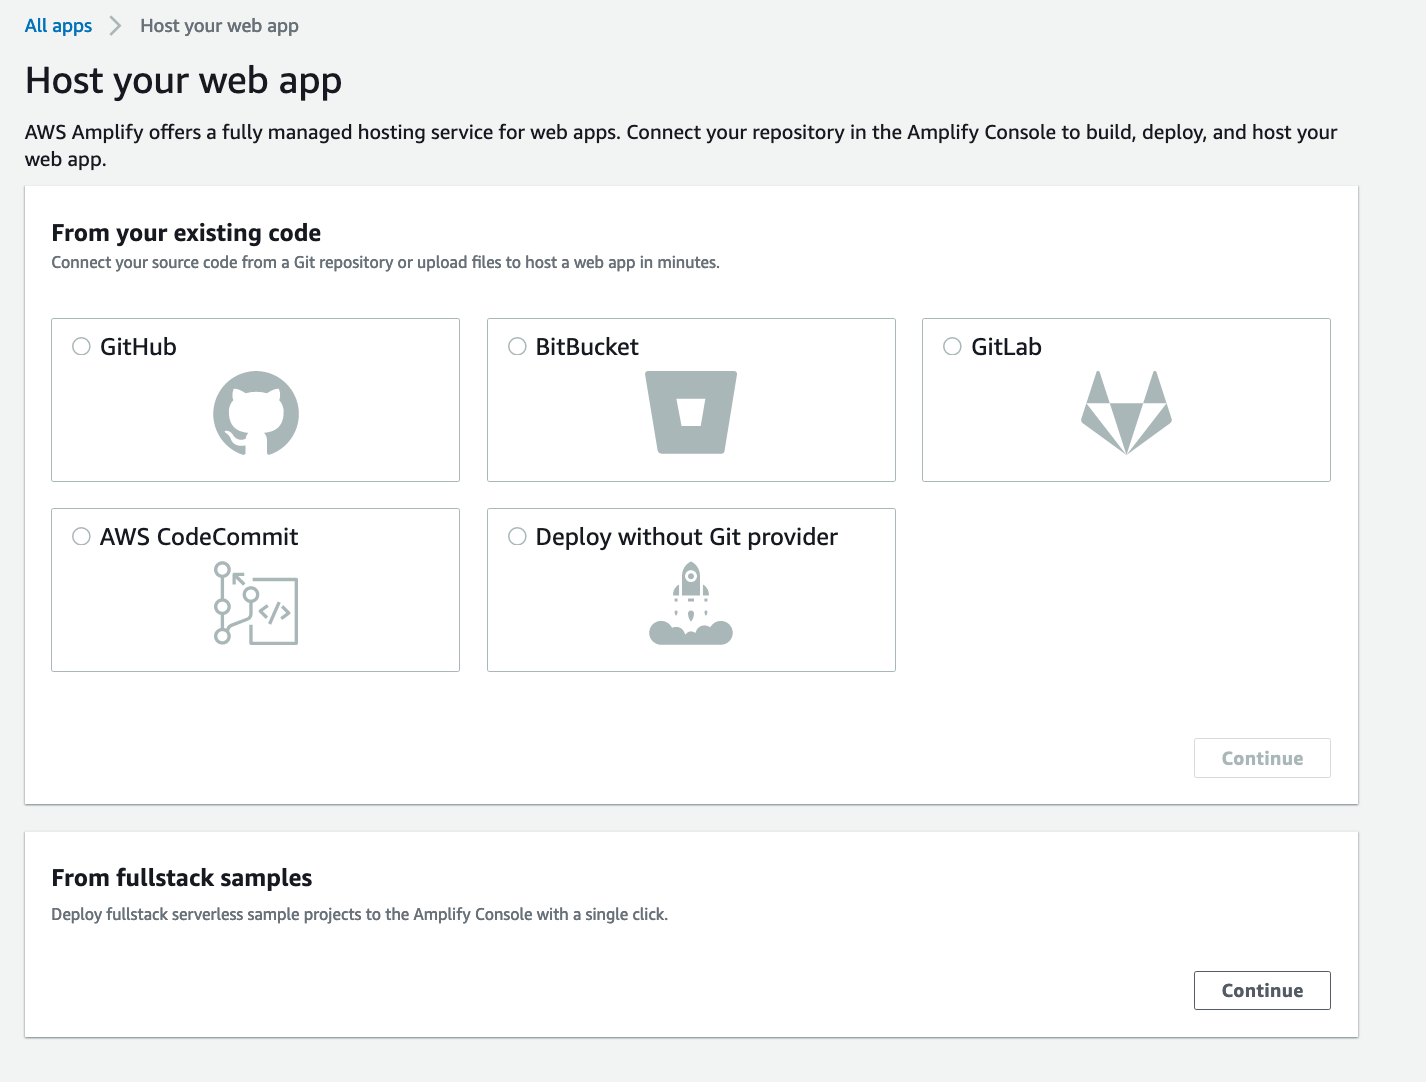
In the AWS Amplify console, select “New app” & “Host web app” from the drop down. The next page will have you select a source code option, choose the provider that you have (I use GitHub).

The next page will redirect you to GitHub for authorization to your repo. Once that’s done select your blog repo from the dropdown menu & branch if it’s something other than main that you would like to deploy.
The next step, and the final one before the review, is to confirm the build settings. PRO TIP: If you are planning on using Google Analytics, edit the build to include the "JEKYLL_ENV=production" before, if not, it will default to the development environment, which won’t push your data to Google.

To add your custom domain to AWS Route53, go to the “DNS Settings” page of your hosting provider (Google Domains, Go Daddy, etc..) and select the “Custom” option shown by your provider. Enter the nameservers exactly as shown from the AWS Route53 entry for your hosted zone and hit save.
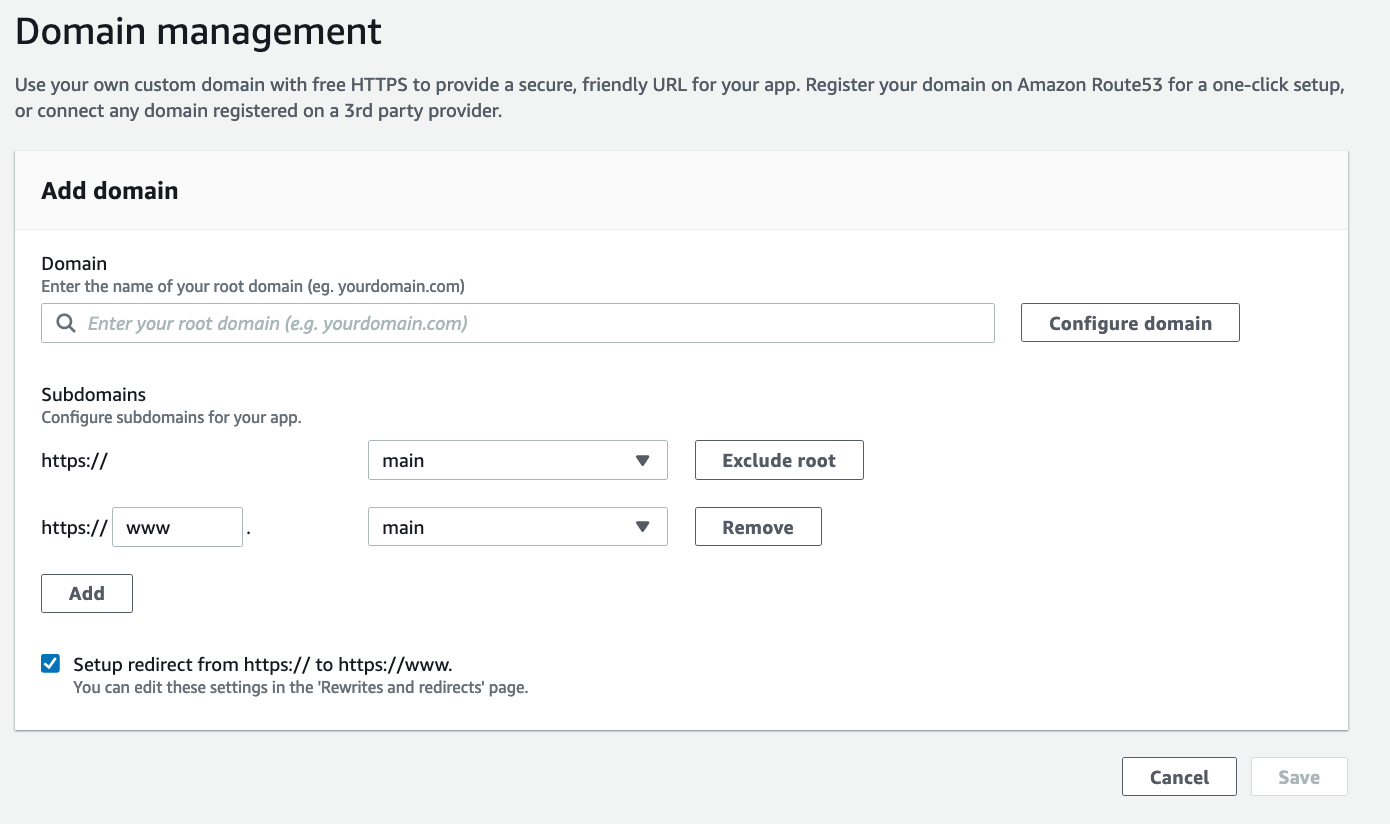
Now, go back to the “Domain management” tab on your app in the AWS Amplify console, and select your domain that was registered in Route53 and select “Configure Domain” to the right of your domain. Make sure this option is selected: Setup redirect from https:// to https://www.

That’s it! Now we have a Jekyll blog hosted on AWS Amplify using Route53. Quite a process, but it’s great to expose yourself to Cloud native solutions and explore more about what AWS has to offer.
If you have any questions, comments, or feedback, please leave a comment.
Thank you for reading! :)
Leave a comment